Strawberry Cheesecake Trifle

If you’re in the mood for a dessert that’s both elegant and easy to make, the strawberry cheesecake trifle is a perfect choice. It’s a delightful combination of creamy cheesecake, fresh strawberries, and tender ladyfingers, all layered together in a glass trifle dish. This dessert not only looks impressive, but it also tastes like a dream—sweet, fruity, and smooth.

The Ingredients You’ll Need

To make a strawberry cheesecake trifle, you need a few simple ingredients that, when combined, create a stunning dessert. Here’s what you’ll need:

  • 2 cups fresh strawberries, sliced: These are the star of the show. Make sure they’re ripe and sweet for the best flavor.
  • 1 cup strawberry jam: This adds a concentrated burst of strawberry flavor between the layers.
  • 2 cups heavy cream: You’ll whip this to create a light and airy texture in the trifle.
  • 1 teaspoon vanilla extract: This adds a hint of warmth to the cream.
  • 1 package cream cheese (8 ounces), softened: The cream cheese forms the base of the cheesecake layer.
  • 1/2 cup powdered sugar: This sweetens the cream cheese and balances the tartness of the strawberries.
  • 1 package ladyfingers (24 count): These serve as the cake layer, providing structure and a subtle sweetness.
  • 1/4 cup orange liqueur or orange juice: This adds a touch of citrus and moisture to the ladyfingers.
  • Fresh mint leaves for garnish: These add a pop of color and a refreshing aroma.

These ingredients are readily available and can be adjusted to suit your taste. For example, if you’re not a fan of orange liqueur, you can use orange juice for a non-alcoholic alternative.

Print

clock clock iconcutlery cutlery iconflag flag iconfolder folder iconinstagram instagram iconpinterest pinterest iconfacebook facebook iconprint print iconsquares squares iconheart heart iconheart solid heart solid icon
Strawberry Cheesecake Trifle

Strawberry Cheesecake Trifle


  • Author: Avani
  • Total Time: 4 hours 40 minutes

Description

Strawberry Trifle just screams summer, doesn’t it? With layers of fresh berries, pound cake, and a luscious cheesecake filling, this trifle dessert will be a hit anytime you serve it! 


Ingredients

2 cups fresh strawberries, sliced
1 cup strawberry jam
2 cups heavy cream
1 teaspoon vanilla extract
1 package cream cheese (8 ounces), softened
1/2 cup powdered sugar
1 package ladyfingers (24 count)
1/4 cup orange liqueur or orange juice
Fresh mint leaves for garnish

Instructions

1. In a mixing bowl, beat the heavy cream with vanilla extract until it forms soft peaks. Set aside.
2. In another bowl, blend the softened cream cheese with powdered sugar until smooth.
3. Fold the whipped cream into the cream cheese mixture gently to keep it fluffy.
4. Spread a layer of ladyfingers at the bottom of a large glass trifle dish, and lightly brush them with orange liqueur or juice.
5. Spread a layer of strawberry jam over the ladyfingers.
6. Add a layer of the cream cheese and whipped cream mixture over the jam.
7. Place a layer of sliced strawberries on top.
8. Repeat the layering process until all ingredients are used, finishing with a layer of strawberries and a few mint leaves for garnish.
9. Refrigerate for at least 4 hours, preferably overnight, to allow the flavors to meld.
  • Prep Time: 20 minutes
  • Cook Time: 4 hours 20 minutes

Preparing the Whipped Cream and Cream Cheese Mixture

Once you have all your ingredients ready, it’s time to start preparing the different layers for your strawberry cheesecake trifle. This part focuses on creating the whipped cream and cream cheese mixture, which will form the creamy layers of your trifle.

Whipping the Cream

Begin by beating the heavy cream with vanilla extract in a mixing bowl. Use a hand mixer or a stand mixer for this step. Start on a low speed to avoid splattering, then gradually increase to medium-high. Continue whipping until the cream forms soft peaks. This means the cream will hold its shape but still be slightly pliable. Be careful not to over-whip, as this can turn the cream into butter.

Once the whipped cream is ready, set it aside. You’ll need it in the next step when you combine it with the cream cheese mixture.

Making the Cream Cheese Mixture

In a separate mixing bowl, blend the softened cream cheese with powdered sugar until smooth. The cream cheese should be at room temperature to ensure a silky texture. If you find any lumps, keep mixing until the consistency is even.

Next, gently fold the whipped cream into the cream cheese mixture. This step requires a light touch to maintain the airy texture of the whipped cream. Use a spatula to fold the cream into the cream cheese, turning the mixture over from the bottom to the top. This technique ensures that the whipped cream retains its fluffiness, which is key to a light and creamy trifle.

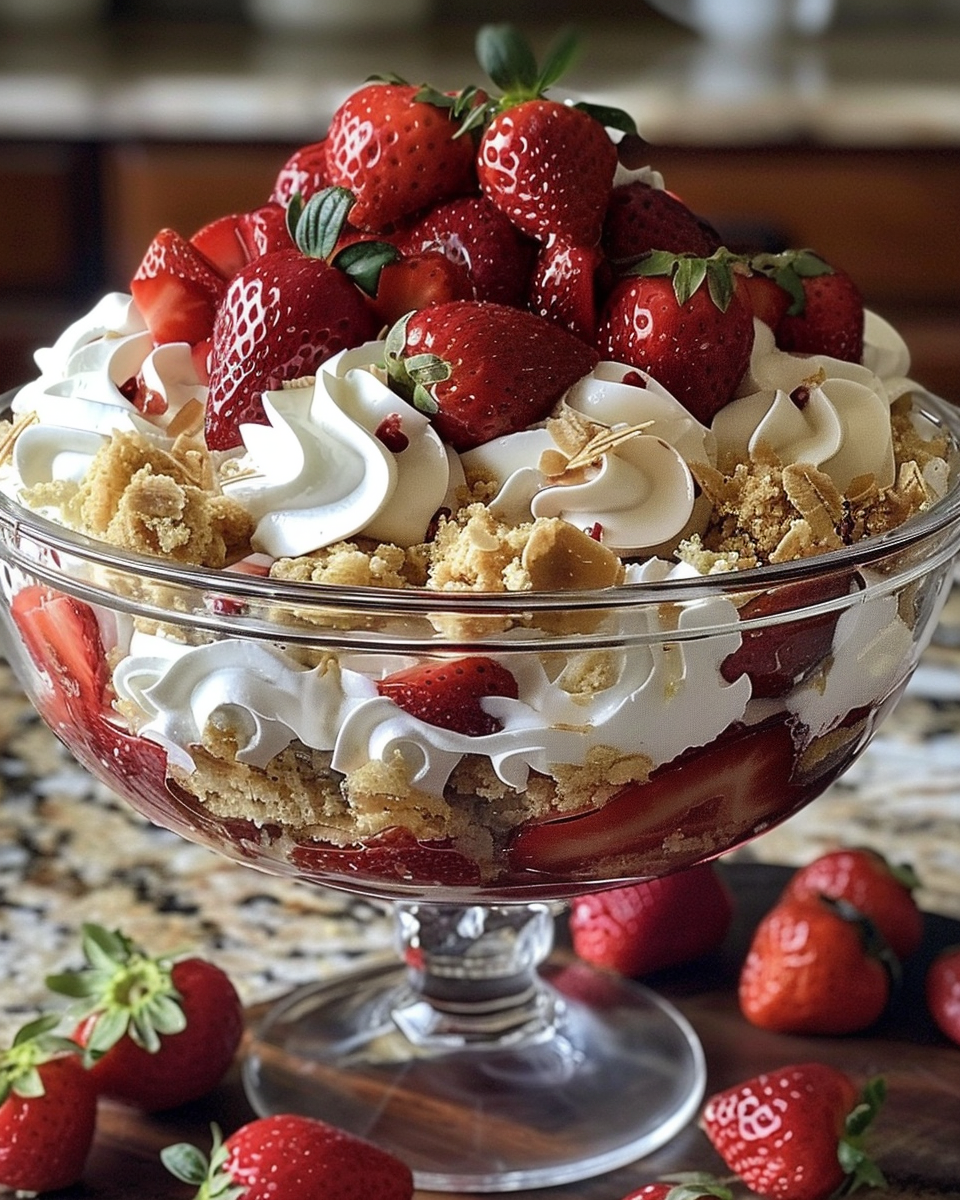
Assembling the Strawberry Cheesecake Trifle

Now that you’ve prepared the whipped cream and cream cheese mixture, it’s time to assemble the trifle. This is where you can get creative with layering and make the dessert as visually appealing as it is delicious. Here’s how to do it step-by-step:

Start with the Ladyfingers

Begin by spreading a layer of ladyfingers at the bottom of a large glass trifle dish. Ladyfingers are light and airy, providing a soft base for the trifle. If you’re using a different cake, like pound cake or angel food cake, cut it into cubes and spread it evenly across the bottom.

Add a Splash of Orange

Lightly brush the ladyfingers with orange liqueur or orange juice. This step not only adds a touch of citrus flavor but also helps keep the ladyfingers moist. If you’re using orange liqueur, it can add a subtle kick to the dessert, while orange juice offers a non-alcoholic option with a refreshing taste.

Spread the Strawberry Jam

Next, spread a layer of strawberry jam over the ladyfingers. This jam provides a burst of intense strawberry flavor and adds moisture to the trifle. Use a spatula to evenly distribute the jam, ensuring that every bite has a taste of strawberry.

Add the Cream Cheese Mixture

Now, it’s time for the cream cheese mixture. Spread a thick layer of the cream cheese and whipped cream mixture over the jam. This layer should be thick enough to balance the other flavors but not so thick that it overpowers the trifle. Use a spatula to smooth it out and cover the entire layer of ladyfingers and jam.

Place a Layer of Sliced Strawberries

On top of the cream cheese layer, place a layer of sliced strawberries. This adds a fresh and vibrant element to the trifle. Arrange the strawberries in a decorative pattern if you like, as this will be visible through the glass trifle dish.

Repeat the Layers

Repeat the layering process, starting with another layer of ladyfingers, followed by the orange liqueur or juice, strawberry jam, cream cheese mixture, and sliced strawberries. Depending on the size of your trifle dish, you may get two or three complete layers. Finish with a layer of strawberries on top.

Garnish with Mint Leaves

As a final touch, add a few fresh mint leaves for garnish. This not only looks attractive but also adds a hint of freshness to the dessert.

With the trifle assembled, it’s time to let it chill and set in the refrigerator. In Part 4, we’ll discuss the importance of refrigeration and offer tips on how long to chill the trifle for the best results. Let’s keep going!

Chilling the Trifle and Serving Tips

After assembling your strawberry cheesecake trifle, the next step is crucial: chilling the dessert. This process allows the flavors to meld together and the layers to set, creating a cohesive and visually appealing trifle. Here’s what you need to know about chilling and serving your trifle for the best results.

Chilling the Trifle

Once you’ve finished assembling the trifle, cover it with plastic wrap or a lid to keep it from absorbing other refrigerator odors. Place it in the refrigerator and let it chill for at least 4 hours. This resting time helps the cream cheese layer firm up and allows the strawberry jam to infuse into the cake layer, creating a harmonious flavor profile.

For the best results, it’s recommended to chill the trifle overnight. This extended chilling period ensures that all the layers are properly set, making it easier to serve without the trifle falling apart.

Serving Suggestions

When you’re ready to serve the trifle, remove it from the refrigerator and let it sit for a few minutes at room temperature. This brief warming period makes the dessert easier to scoop and helps bring out the flavors.

To serve the trifle, use a large spoon or a serving spatula to scoop into dessert bowls. You can also use smaller individual trifle dishes if you prefer single-serving portions. The key is to ensure that each serving includes a bit of every layer—cake, cream cheese, jam, and strawberries.

If you’re serving the trifle at a party or special event, consider garnishing with additional mint leaves for a fresh and elegant touch. This adds a pop of color and makes the dessert look even more inviting.

Variations and Additional Tips

The great thing about trifles is that they’re highly adaptable. You can experiment with different types of cake, such as pound cake or sponge cake, and switch up the fruit to suit your preferences. For a patriotic twist, you could add blueberries to create a red, white, and blue theme.

If you’re serving the trifle to a large crowd, consider making extra layers or using a larger trifle dish. This ensures that everyone gets a generous portion of this delicious dessert.

With your trifle chilled and ready to serve, you’re all set to enjoy a sweet and refreshing treat. In the next part, we’ll address some frequently asked questions (FAQs) about making strawberry cheesecake trifle, including common issues and how to solve them. Stay tuned!

FAQs about Strawberry Cheesecake Trifle

Making a strawberry cheesecake trifle is a fun and straightforward process, but you might have some questions about ingredient substitutions, preparation tips, and storage recommendations. Here are some frequently asked questions (FAQs) to help you navigate any uncertainties.

1. Can I use frozen strawberries instead of fresh?

Yes, you can use frozen strawberries, but make sure to thaw them first and drain any excess liquid. This step prevents the trifle from becoming too watery. Fresh strawberries are ideal for their texture and flavor, but frozen strawberries work in a pinch, especially when fresh ones are out of season.

2. What if I don’t have a trifle dish?

No worries! You can use any large glass bowl or even a casserole dish. The key is to have enough depth for the layers and to ensure the dish is transparent so you can see the beautiful layers. Individual dessert cups are also a great option for personal servings.

3. Can I make the trifle ahead of time?

Absolutely! Trifles are perfect for making ahead. You can assemble the trifle a day in advance and keep it refrigerated until you’re ready to serve. This makes it an excellent dessert for parties and gatherings, as you can prepare it ahead of time and focus on other aspects of your event.

4. How long does the trifle last in the refrigerator?

A properly stored trifle can last in the refrigerator for up to 3 days. However, it’s best to enjoy it within 1-2 days for optimal freshness. Make sure to keep it covered with plastic wrap or a lid to prevent it from drying out or absorbing other flavors from the refrigerator.

5. Can I substitute the ladyfingers with another type of cake?

Yes, you can use pound cake, sponge cake, or even angel food cake. The key is to have a cake layer that can soak up some moisture without becoming too soggy. If you’re using a different type of cake, adjust the amount of orange liqueur or juice to ensure it doesn’t get too wet.

6. What other flavors can I add to the trifle?

You can experiment with different extracts and liqueurs to add unique flavors to the trifle. Almond extract, Amaretto, or Grand Marnier can add interesting twists. You can also add blueberries, raspberries, or other fruits to create a variety of flavor profiles.

These FAQs should help you with any questions or concerns about making a strawberry cheesecake trifle. In the next part, we’ll conclude the article with some final thoughts and suggestions for exploring other trifle recipes. Let’s wrap it up!

Leave a Comment

Recipe rating