Bread Making

There’s something undeniably magical about the process of bread making. From the simple combination of flour, yeast, water, and a touch of sugar and oil, emerges a staple that has been cherished across cultures and ages. The aroma of freshly baked bread is universally inviting, offering a sense of warmth and home. This article will guide you through the journey of making bread at home—from gathering the essential ingredients to pulling a golden loaf out of the oven.

Introduction to Bread Making 

Why Make Bread at Home?

Making bread at home might seem like a daunting task reserved for the patient or the skilled, but it’s surprisingly simple and incredibly rewarding. The reasons to take up this wholesome activity are many. Firstly, the quality of homemade bread surpasses anything you can buy at a store. There’s complete control over the ingredients, allowing you to avoid preservatives and additives found in commercial breads.

Secondly, the act of making bread is therapeutic. The rhythmic nature of kneading dough is meditative, providing a unique blend of calm and satisfaction. Moreover, nothing compares to the pride of pulling your own perfectly browned loaf from the oven. The smell of freshly baked bread filling your home is just the icing on the cake—or better yet, the butter on your bread!

So, whether you’re looking to improve your culinary skills, control what goes into your food, or simply enjoy the pleasures of a handmade loaf, this guide will walk you through every step of the bread-making process. Let’s get our hands floury and our ovens preheated for a baking adventure that ends with the perfect slice of home.

Essential Ingredients for Bread Making 

Key Ingredients and Their Roles

The path to a perfect loaf begins with understanding the essential components that go into bread. Here are the core ingredients you’ll need, along with their specific functions in the bread-making process:

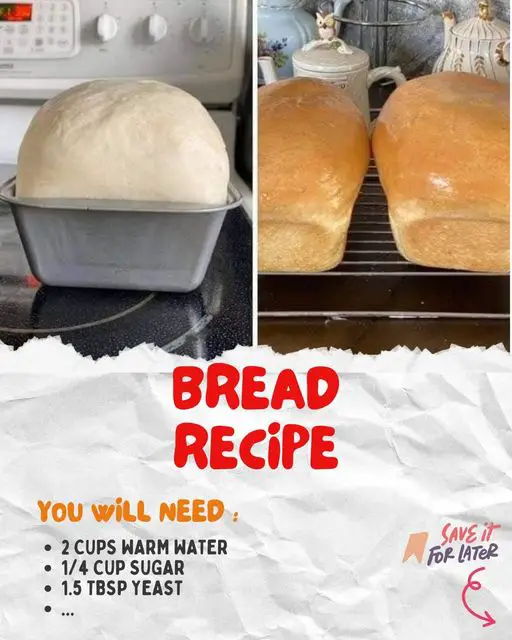
  • Flour: This is the backbone of your bread, providing structure and volume. While all-purpose flour works well for basic recipes, experimenting with different types like whole wheat or bread flour can enhance the texture and nutritional content.
  • Yeast: A crucial ingredient, yeast is a living organism that causes the dough to rise by producing carbon dioxide during fermentation. Fast-action or instant yeast accelerates this process, making it more convenient for home bakers.
  • Warm Water: The catalyst for activating yeast. The temperature of the water is pivotal; too hot, and you risk killing the yeast, too cold, and it won’t activate efficiently.
  • Sugar: Acts as food for the yeast, helping it grow and produce gas that leavens the bread. It also enhances the golden color and crusty texture of the baked loaf.
  • Salt: Adds flavor and regulates yeast activity, ensuring the bread doesn’t rise too quickly.
  • Vegetable Oil: Helps soften the dough, contributing to the bread’s moistness and keeping it fresh longer.

By combining these ingredients in the right proportions, you set the stage for bread that’s not only delicious but also a joy to make. Let’s mix these components together and see the magic unfold in our kitchens.

Basic Bread Recipe 

Step-by-Step Guide

Now that you’re familiar with the essential ingredients, let’s dive into the basic recipe that will yield a soft, delicious loaf of bread. Here’s how to put these ingredients to work:

Ingredients:

  • 2 cups warm water
  • 1/4 cup sugar
  • 1.5 tbsp yeast
  • 1.5 tsp salt
  • 1/4 cup vegetable oil
  • 5.5 cups flour (all-purpose)

Instructions:

  1. Prepare the Yeast Mixture:
    • Start by dissolving the sugar in the warm water in a large mixing bowl. The water should be warm to the touch, around 110°F, which is ideal for activating the yeast.
    • Sprinkle the yeast over the sugary water and let it sit for about 5-10 minutes until it becomes frothy. This process, known as proofing, ensures that the yeast is alive and ready to work its magic.
  2. Mix the Dry Ingredients:
    • In a separate bowl, mix the flour with the salt. This step prevents the salt from coming in direct contact with the yeast, which could hinder its activity.
  3. Combine Wet and Dry Ingredients:
    • Add the vegetable oil to the proofed yeast mixture, stirring to combine.
    • Gradually add the dry ingredients to the wet, one cup at a time, stirring after each addition until a soft dough forms.
  4. Knead the Dough:
    • Turn the dough onto a lightly floured surface and knead for 3-5 minutes until it is smooth and elastic. Kneading develops the gluten in the flour, giving the bread its structure and chewy texture.
  5. First Rise:
    • Place the dough in an oiled bowl, turning it to coat all sides with oil. Cover the bowl with a damp cloth and let it rise in a warm place for about an hour, or until it has doubled in size.
  6. Shape and Second Rise:
    • Punch down the dough to release any air bubbles. Shape it into loaves or any desired form and place them into greased bread pans. Cover and let rise for another 30-40 minutes, until puffy.
  7. Bake:
    • Bake in a preheated oven at 350°F for approximately 30 minutes, or until the tops are golden brown and the loaves sound hollow when tapped.
  8. Finishing Touches:
    • Brush the tops with butter while warm for a soft, flavorful crust.

This straightforward bread recipe is perfect for beginners and offers a reliable base for more creative baking endeavors. Enjoy the unmatched satisfaction of slicing into your own freshly baked bread, and share the joy with friends and family.

Tips for Perfect Bread Every Time 

Kneading and Proofing Techniques

Achieving the perfect loaf of bread isn’t just about following a recipe—it’s also about mastering a few key techniques. Here are some essential tips for kneading and proofing that can elevate your bread from good to great:

  • Kneading: This crucial step develops the gluten in your dough, which is necessary for a good structure and chew. Knead your dough on a lightly floured surface until it’s smooth and elastic. If the dough springs back when poked, it’s an indicator that you’ve kneaded it enough. A good kneading session usually lasts about 5 to 10 minutes.
  • Proofing: Also known as the first rise, this is when the magic of yeast turns your dough into a puffy, airy mass. The ideal proofing environment is warm and free from drafts, typically around 75°F. If your kitchen is cool, you can proof dough in an oven that’s turned off but with the light on for warmth. The dough should roughly double in size and not spring back quickly when poked with a finger.

Best Practices for Proofing Bread

  • Timing is Key: Over-proofed dough will collapse, and under-proofed dough won’t have the right texture. Watch your dough rather than the clock to know when it’s just right.
  • Consistency Matters: Ensure your rising environment is consistent. Sudden temperature changes can affect how your dough rises.

By mastering these kneading and proofing techniques, you’ll ensure your homemade bread is consistently delicious and beautifully textured every time. Remember, practice makes perfect, so don’t be discouraged if your first few loaves aren’t flawless.

Variations on the Basic Recipe 

Incorporating Different Flavors and Ingredients

Once you’ve mastered the basic bread recipe, you might want to experiment with adding a variety of flavors and ingredients to personalize your loaves. Here are some creative ideas to spice up your bread-making routine:

  • Herbs and Spices: Fresh or dried herbs like rosemary, thyme, or basil can add a delightful aroma and taste to your bread. Mix these directly into the dough during the kneading stage. For a sweet variation, consider adding cinnamon or nutmeg.
  • Cheeses: Incorporate grated cheese such as cheddar, Parmesan, or mozzarella into the dough for a delicious cheesy bread. You can add cheese within the dough or sprinkle it on top before the final rise for a crispy crust.
  • Seeds and Nuts: Sunflower seeds, sesame seeds, pumpkin seeds, or chopped walnuts can be mixed into the dough or sprinkled on top for added texture and nutrients.
  • Whole Grains: For a healthier twist, replace part of the all-purpose flour with whole grain flours such as whole wheat, rye, or spelt. Whole grains give the bread a denser texture and a nuttier flavor, plus they boost the nutritional content.
  • Olives and Sun-Dried Tomatoes: Chopped olives or sun-dried tomatoes can give your bread a Mediterranean flair. These are best mixed into the dough after the initial mixing stage.

Experimenting with different ingredients not only enhances the flavor of your bread but also makes each loaf uniquely yours. Feel free to mix and match ingredients based on your preferences and dietary requirements. The possibilities are endless, and each variation can transform your bread into something special.

Common Bread Making Mistakes and How to Avoid Them 

Troubleshooting Guide

Even seasoned bakers occasionally encounter issues with their bread. Here are some common bread-making mistakes and tips on how to avoid them:

  • Dense or Heavy Bread: This often results from not kneading the dough long enough. To develop the gluten fully, make sure to knead the dough for at least 5 to 10 minutes. Also, ensure that your yeast is fresh and active for optimal rise.
  • Dough Not Rising: If your dough doesn’t rise, the yeast might not be active, which could be due to expired yeast or liquids that are too hot or too cold. Always check the expiration date on your yeast and ensure that your liquids are warm (about 110°F) to touch, not hot.
  • Crust Too Hard or Too Soft: A crust that’s too hard could be the result of baking at too high a temperature, while a soft crust might not have had enough baking time. Adjust your oven temperature and baking time accordingly. Brushing the crust with butter right after baking will soften it, while leaving the bread in the oven with the door slightly open can help crisp up the crust.
  • Bread Collapses or Flattens: This might be due to over-proofing. To avoid this, watch the dough rather than the clock during the second rising; it should almost double in size but still retain a bit of spring when poked.

By keeping these tips in mind, you can prevent common problems and bake beautiful, delicious bread every time. Remember, practice and patience are key to mastering the art of bread making.

FAQs 

Q1: How long should bread dough be kneaded?

  • A: Typically, bread dough should be kneaded for about 5 to 10 minutes. However, the exact time can depend on the technique and the dough’s texture. The dough is ready when it’s smooth, elastic, and slightly tacky but not sticky.

Q2: Can bread dough be over-proofed?

  • A: Yes, if dough is left to rise for too long, it can over-proof, causing the gluten structure to weaken and the bread to collapse during baking. Keep a close eye on your dough and only allow it to double in size.

Q3: What are the best storage practices for homemade bread?

  • A: To keep bread fresh, store it in a bread box or wrapped in a clean cloth inside a plastic bag at room temperature. Avoid refrigeration as it can dry out the bread. Bread can also be sliced and frozen for longer storage.

Q4: What is the difference between baking in a bread machine vs. an oven?

  • A: Bread machines are more convenient and maintain an ideal proofing and baking environment, but they generally yield a softer crust and less traditional shape. Oven baking offers more control over the bread’s appearance and texture, especially for crustier breads.

Conclusion:

Embracing the art of bread making is not just about feeding oneself; it’s a rewarding journey into the heart of home cooking. The act of mixing, kneading, and baking bread is as much about nurturing the soul as it is about crafting delicious, nourishing food. With the guidance provided, anyone can transform simple ingredients into beautiful loaves that are both a pleasure to make and a joy to share.

As you continue to explore the world of bread making, remember that each loaf you bake is a reflection of your care and creativity. Don’t be afraid to experiment with different flours, flavors, and shapes. Each variation not only adds excitement to the process but also depth to your baking repertoire.

So, whether you’re a novice baker taking the first step or an experienced one looking to refine your skills, keep the oven warm and the flour handy. The path to perfect bread is a delightful one, filled with the aroma of freshly baked goodness and the satisfaction of a job well done. Happy baking!

Print
clock clock iconcutlery cutlery iconflag flag iconfolder folder iconinstagram instagram iconpinterest pinterest iconfacebook facebook iconprint print iconsquares squares iconheart heart iconheart solid heart solid icon
bread recipe

Bread Making


  • Author: Avani

Description

The only bread recipe I have been successful with. Quick, easy, and tastes great!!


Ingredients

Makes two loaves.
2 cups warm water
1/4 cup sugar
1.5 tbsp yeast
1.5 tsp salt
1/4cup vegetable oil
5.5 cups flour (I just used all purpose)

Instructions

Dissolve sugar in warm water. Add yeast and let proof. Mix oil into yeast mixture once proofed.
Mix flour and salt in separate bowl.
Add dry mixture to wet mixture one cup at a time and stir / mix until soft dough forms.
Knead for 3-5 minutes.
Place in oiled bowl, turn over to coat both sides. Let rise one hour.
Punch down, shape into loaves. Place into greased bread pans. Let rise 30-40 minutes.
Bake at 350 for approx 30 minutes. Brush tops with butter while warm.

Leave a Comment

Recipe rating