Blue Velvet Oreo Brownies are a unique twist on classic brownies, combining the rich taste of chocolate with a vibrant blue hue and a decadent Oreo truffle layer. These brownies are a hit at parties, family gatherings, or when you want to indulge in a special treat. This article will explore the recipe in detail, providing step-by-step instructions, serving suggestions, and common questions about these delightful brownies.
Introduction to Blue Velvet Oreo Brownies
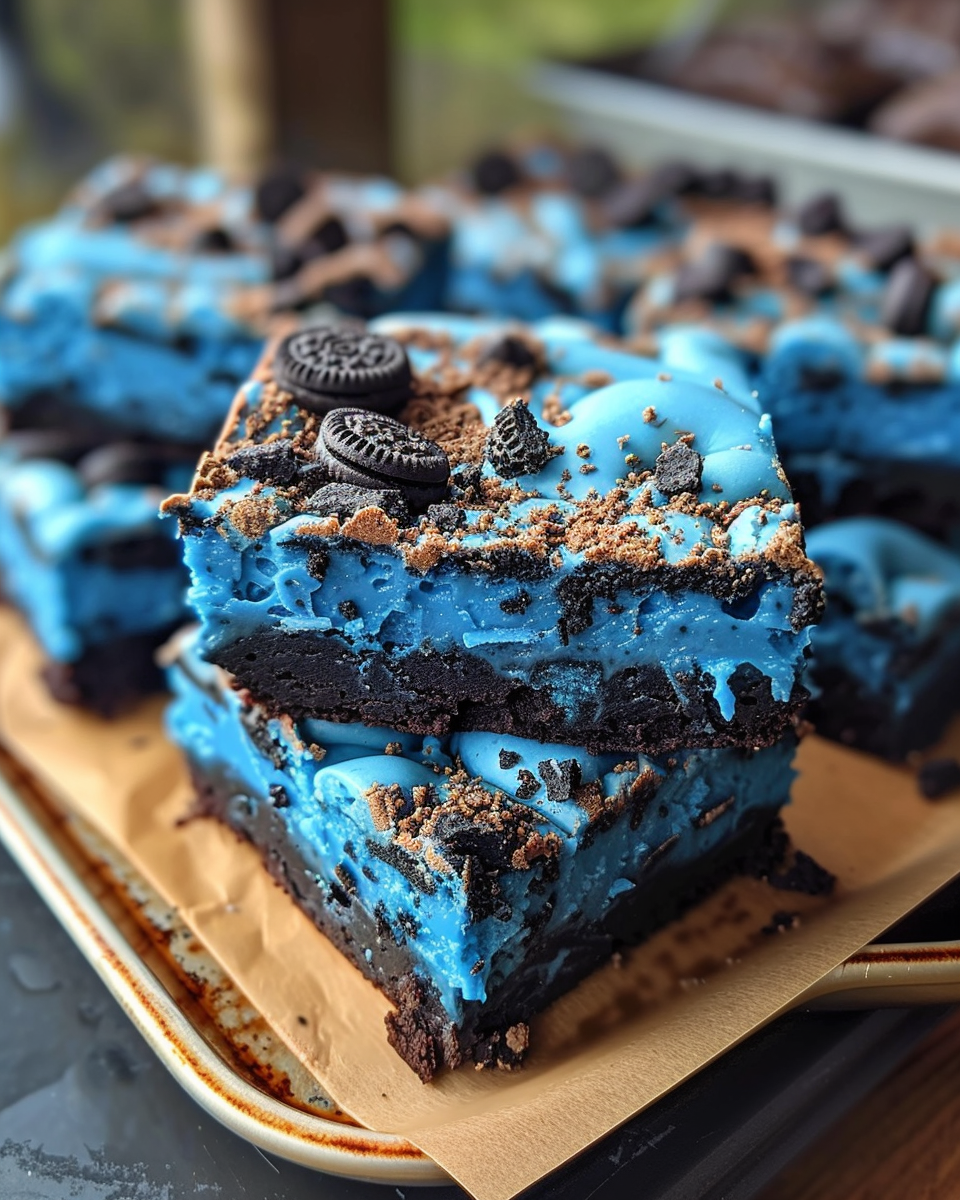
When you think of brownies, you usually envision rich, chocolatey squares that are perfect for a quick dessert or a snack. Blue Velvet Oreo Brownies take this concept to the next level, offering a visually striking treat with layers of flavor and texture. The deep blue color adds a fun twist, while the Oreo truffle layer brings a creamy, crunchy contrast to the brownies.
These brownies are ideal for those who enjoy a combination of sweet and indulgent flavors. The base is a traditional brownie with a royal blue hue, topped with a layer of crushed Oreo truffle, and finished with a smooth white chocolate layer. Each bite is a delightful mix of rich chocolate, sweet Oreo, and creamy white chocolate.
The best part about Blue Velvet Oreo Brownies is their versatility. You can make them for special occasions or simply to satisfy a sweet craving. Plus, they can be easily customized with different toppings and mix-ins to suit your taste.
In the following sections, we’ll explore the history of velvet cakes, detail the key ingredients for these brownies, and provide step-by-step instructions to help you create the perfect batch of Blue Velvet Oreo Brownies. Let’s get started on this colorful dessert journey.
Print
Blue Velvet Oreo Brownies
Description
Dive into the decadent world of Blue Velvet Oreo Brownies, where classic dessert meets modern flair. These brownies merge the vibrant richness of blue velvet cake with the beloved crunch of Oreo cookies, creating a layered treat that’s as visually arresting as it is delicious. Topped with a smooth white chocolate layer and a sprinkle of mini chocolate chips, these brownies offer a texture and taste experience that’s sure to delight dessert aficionados and casual sweets lovers alike.
Ingredients
Instructions
History and Origin of Blue Velvet Oreo Brownies
To understand the allure of Blue Velvet Oreo Brownies, we need to look at the evolution of velvet cakes and the impact of Oreos on dessert culture. Velvet cakes, traditionally red, have been a staple in American baking for decades, known for their soft, tender crumb and rich, velvety texture. The unique texture of velvet cakes comes from a combination of acidic ingredients and cocoa powder, which gives them their characteristic softness.
While red velvet cakes are the most famous, bakers began experimenting with other colors to create unique variations. The introduction of blue velvet cake was a bold move, bringing a vibrant twist to the classic dessert. The deep blue hue, often achieved with blue food coloring and a hint of violet, creates a striking visual impact that makes these cakes stand out.
The addition of Oreos to brownies brought another level of indulgence to the dessert world. Oreos, with their crunchy chocolate cookies and creamy filling, have become a beloved snack and a popular ingredient in various desserts. By combining blue velvet cake with an Oreo truffle layer, Blue Velvet Oreo Brownies offer a fusion of flavors and textures that appeals to a wide range of dessert lovers.
These brownies have gained popularity for their eye-catching appearance and irresistible taste. The blue velvet base provides a rich and moist foundation, while the Oreo truffle layer adds a creamy crunch. Topped with a smooth layer of white chocolate, these brownies are a decadent treat that can be customized with different toppings and decorations.
In the next section, we’ll explore the exact ingredients and equipment needed to create Blue Velvet Oreo Brownies. With the right components, you can recreate this delightful dessert in your own kitchen, impressing friends and family with your baking skills.
Ingredients and Equipment Needed for Blue Velvet Oreo Brownies
Creating Blue Velvet Oreo Brownies requires a unique blend of ingredients and specific equipment to ensure the perfect texture and flavor. This section outlines the essentials for both the brownies and the Oreo truffle layer, along with the tools you’ll need for a successful baking experience.
3.1. List of Ingredients
To make the brownies, you’ll need the following ingredients:
- 4 ounces bittersweet chocolate bar, chopped: This serves as the base chocolate for the brownies.
- ¾ cup butter: Butter adds richness and helps create a moist texture.
- 2 cups sugar: The sugar provides sweetness and contributes to the brownie crust.
- 4 large eggs: Eggs bind the ingredients and add moisture.
- 1½ cups all-purpose flour: Flour provides structure and stability.
- 1½ teaspoons baking powder: This helps the brownies rise slightly.
- 1 teaspoon vanilla extract: For flavor and aroma.
- ⅛ teaspoon salt: A touch of salt enhances the other flavors.
- 1 tablespoon Wilton royal blue gel food coloring: This gives the brownies their vibrant blue color.
- A dab of Wilton violet gel food coloring: This enhances the blue color for a deeper hue.
For the Oreo truffle layer, you’ll need:
- 1 package Oreo cookies: The Oreos are crushed to create the truffle layer.
- 8 ounces cream cheese, softened: Cream cheese binds the crushed Oreos and provides a creamy texture.
For the white chocolate layer, you’ll need:
- 10 ounces white chocolate bark or chips: This forms the smooth topping.
- Mini chocolate chips: For garnish and additional chocolate flavor.
3.2. Required Equipment
To prepare the brownies and truffle layer, you’ll need the following equipment:
- Mixing bowls: At least two bowls for combining ingredients.
- Saucepan: For melting the chocolate and butter.
- Baking pan (9×9 inches or similar size): This size works well for brownies.
- Electric mixer: Helpful for combining the ingredients smoothly.
- Parchment paper: To line the baking pan for easy removal.
- Spatula: For spreading the truffle and white chocolate layers.
With these ingredients and equipment, you’re ready to create Blue Velvet Oreo Brownies. The following section provides detailed step-by-step instructions to guide you through the entire process, from preparing the brownie base to adding the Oreo truffle layer and white chocolate topping.
Step-by-Step Recipe Instructions for Blue Velvet Oreo Brownies
Now that you have your ingredients and equipment, let’s walk through the process of making Blue Velvet Oreo Brownies. These step-by-step instructions will guide you from preparing the brownie base to adding the Oreo truffle layer and finishing with the white chocolate topping.
4.1. Making the Blue Velvet Brownies
- Preheat the Oven: Set your oven to 350°F (175°C) to ensure it’s ready for baking.
- Prepare the Baking Pan: Grease a 9×9-inch baking pan and line it with parchment paper for easy removal of the brownies.
- Melt the Chocolate and Butter: In a saucepan over low heat, melt the chopped bittersweet chocolate bar and butter, stirring until smooth and fully melted. Remove from heat and let cool slightly.
- Add the Sugar: Whisk the sugar into the melted chocolate and butter mixture. This step helps dissolve the sugar and creates a smooth consistency.
- Add the Eggs and Food Coloring: Incorporate the eggs one at a time, beating well after each addition. Stir in the royal blue gel food coloring and violet gel food coloring to achieve a deep blue color.
- Mix in the Dry Ingredients: Add the flour, baking powder, vanilla extract, and salt to the mixture. Gently fold until just combined, avoiding overmixing.
- Bake the Brownies: Pour the batter into the prepared baking pan and spread it evenly. Bake for 44-48 minutes, or until a toothpick inserted into the center comes out clean. Let the brownies cool completely in the pan before adding the next layers.
4.2. Preparing the Oreo Truffle Layer
- Crush the Oreos: Place the Oreo cookies in a plastic bag and crush them with a rolling pin, or use a food processor to create a fine crumb.
- Mix with Cream Cheese: In a mixing bowl, combine the crushed Oreos with cream cheese. Stir until well combined and smooth.
- Spread the Truffle Layer: Once the brownies have cooled, spread the Oreo truffle mixture evenly over the top. Use a spatula to create a smooth layer.
4.3. Adding the White Chocolate Topping
- Melt the White Chocolate: In a double boiler or microwave, melt the white chocolate bark or chips until smooth. If using a microwave, heat in short bursts to avoid burning the chocolate.
- Spread the White Chocolate: Pour the melted white chocolate over the Oreo truffle layer. Use a spatula to spread it evenly across the surface.
- Garnish with Mini Chocolate Chips: While the white chocolate is still warm, sprinkle mini chocolate chips over the top for added texture and flavor.
- Chill the Brownies: Place the pan in the refrigerator and let the brownies cool until the white chocolate sets. This step helps the layers firm up and makes it easier to cut the brownies into squares.
With these instructions, your Blue Velvet Oreo Brownies should turn out perfectly. The following section will discuss serving suggestions and variations to help you make these brownies uniquely yours.
Serving Suggestions and Variations for Blue Velvet Oreo Brownies
Once your Blue Velvet Oreo Brownies are ready, there are several ways to serve them, along with a variety of creative variations to keep things interesting. This section provides suggestions for serving and ideas for customizing your brownies to suit different tastes.
Serving Suggestions
- Cut into Squares or Rectangles: To serve, cut the brownies into squares or rectangles. For cleaner cuts, use a sharp knife and wipe it clean between cuts.
- Serve with Whipped Cream: Add a dollop of whipped cream on top for a light and airy touch. The creaminess complements the rich flavors of the brownies.
- Pair with Ice Cream: Serve the brownies with a scoop of vanilla or cookies and cream ice cream for an indulgent dessert. The combination of warm brownies and cold ice cream is irresistible.
- Offer Dipping Sauces: Provide a variety of dipping sauces like chocolate ganache, caramel, or fruit sauces to enhance the brownie experience.
- Presentation Tips: For a party or gathering, arrange the brownies on a decorative plate or cake stand. You can also add fresh berries or mint leaves for a pop of color.
Variations and Customizations
- Add Marshmallows: For a gooey twist, mix in mini marshmallows into the brownie batter. They create pockets of melted sweetness throughout the brownies.
- Incorporate Caramel Drizzle: Drizzle caramel sauce over the white chocolate layer for an added layer of flavor and visual appeal.
- Try Different Food Coloring: While royal blue is the classic choice, you can experiment with other colors to create unique variations. Just ensure the coloring doesn’t affect the taste.
- Use Alternative Chocolates: If you prefer dark chocolate or milk chocolate, adjust the recipe to use these types of chocolate for the brownie base or white chocolate layer.
- Create a Swirled Effect: For a fun presentation, use a toothpick to create a swirled effect in the white chocolate layer by adding a different color or topping.
With these serving suggestions and variations, you can create Blue Velvet Oreo Brownies that suit any occasion and satisfy a variety of tastes. In the next section, we’ll explore the nutritional information for these brownies and offer tips for making them healthier without sacrificing flavor.
Nutritional Information for Blue Velvet Oreo Brownies
While Blue Velvet Oreo Brownies are undeniably delicious, it’s helpful to understand their nutritional content, especially for those who want to enjoy them in moderation. This section provides an overview of the calories, key nutrients, and tips for making these brownies a bit healthier.
Caloric Content and Serving Size
A typical serving of Blue Velvet Oreo Brownies contains approximately 200-250 calories, depending on the size of the squares and the amount of truffle and white chocolate layers. This calorie range is typical for rich desserts, so it’s best to enjoy them as an occasional treat or shared among friends.
The serving size is usually 1/9th to 1/12th of the 9×9-inch baking pan, depending on how large you cut the brownies. Smaller servings can help reduce the calorie intake while allowing you to savor the flavors.
Nutritional Components
- Chocolate: The bittersweet chocolate provides a source of antioxidants, which can offer health benefits when consumed in moderation. It also contains some vitamins and minerals, such as magnesium and iron.
- Oreo Cookies: While Oreos are high in sugar and fat, they contribute to the distinct flavor and texture of the brownies. The cream cheese in the truffle layer adds calcium and protein.
- Eggs: Eggs are a source of high-quality protein, contributing to the structure and moisture of the brownies.
Tips for Making Healthier Brownies
To make Blue Velvet Oreo Brownies a bit healthier, consider these tips:
- Reduce Sugar: You can reduce the amount of sugar in the brownie base without compromising the texture. Alternatively, use a sugar substitute or natural sweeteners like honey or maple syrup.
- Use Low-Fat Cream Cheese: To lower the fat content, opt for reduced-fat cream cheese for the truffle layer. It maintains the creaminess with fewer calories.
- Opt for Dark Chocolate: Using a higher percentage of dark chocolate in the brownie base can reduce sugar content and add more antioxidants.
- Bake Instead of Frying: If you want to reduce fat, consider baking rather than frying, which applies more to other recipes but could be helpful in some brownie recipes that call for frying elements.
By following these tips, you can enjoy Blue Velvet Oreo Brownies while keeping the calorie count in check. In the next section, we’ll cover storage and preservation methods to ensure your brownies stay fresh and retain their texture for days to come.
Storing and Preserving Blue Velvet Oreo Brownies
To maintain the freshness and flavor of Blue Velvet Oreo Brownies, proper storage is key. This section covers the best practices for storing and preserving brownies, along with tips for keeping them moist and delicious.
Refrigerating the Brownies
- Airtight Containers: After baking, let the brownies cool completely. Once cooled, cut them into squares or rectangles, then store them in an airtight container. This helps prevent the brownies from drying out and keeps the layers intact.
- Refrigeration Temperature: Keep the brownies in the refrigerator at a temperature between 35°F and 40°F (1.6°C to 4.4°C). This range ensures freshness without freezing the brownies.
- Layer with Parchment Paper: If stacking the brownies in a container, place parchment paper between the layers to prevent sticking and help maintain their shape.
Freezing the Brownies
If you’d like to store the brownies for a longer period, freezing is a suitable option:
- Wrap Individually: To freeze, wrap each brownie square individually in plastic wrap, then place them in a resealable freezer bag. This prevents freezer burn and keeps the brownies from absorbing other freezer odors.
- Label and Date: Write the date on the bag or use a label to keep track of when the brownies were frozen. This helps you know how long they’ve been stored.
- Thawing the Brownies: When you’re ready to eat, thaw the brownies in the refrigerator overnight. This ensures they thaw evenly without becoming soggy.
Reheating the Brownies
If you’d like to enjoy warm brownies, here’s how to reheat them:
- Oven Reheating: Preheat your oven to 350°F (175°C). Place the brownies on a baking sheet and heat for about 10 minutes, or until warm. This helps restore their original texture and flavor.
- Microwave: For a quick reheat, you can use the microwave. Place the brownie on a microwave-safe plate and heat in short bursts, checking frequently to avoid overheating.
By following these storage and preservation tips, you can keep your Blue Velvet Oreo Brownies fresh and ready to enjoy for days to come. In the next section, we’ll answer some frequently asked questions about these brownies to address common concerns and provide additional guidance.
Frequently Asked Questions about Blue Velvet Oreo Brownies
Even with a detailed recipe, questions can arise when making Blue Velvet Oreo Brownies. This section addresses common questions to help you navigate any challenges and create perfect brownies every time.
FAQ 1: Can I make these brownies ahead of time?
Yes, you can make the brownies ahead of time. Prepare the brownies according to the recipe, let them cool completely, and store them in an airtight container in the refrigerator. You can make them a day or two in advance. If you want to keep them longer, consider freezing and thawing them as needed.
FAQ 2: How do I prevent the brownies from drying out?
To prevent dryness, ensure the brownies are stored in an airtight container. If the brownies seem dry, you can add a thin layer of icing or syrup to add moisture. When reheating, use low heat and cover with foil to retain moisture.
FAQ 3: What’s the best way to cut the brownies without them falling apart?
To cut the brownies cleanly, ensure they’re completely cooled. Use a sharp knife and wipe it clean between cuts to avoid smearing. For even squares, score the brownies lightly before cutting. If you have a warm knife, this can also help with clean cuts.
FAQ 4: Can I substitute different chocolates or food coloring?
Absolutely. You can use different types of chocolate, like milk chocolate or dark chocolate, for a unique flavor. If you’d like to use other colors, make sure the food coloring doesn’t affect the taste or texture of the brownies. Gel food coloring works well for achieving vibrant colors without altering the flavor.
FAQ 5: How long do these brownies last in the fridge?
When stored properly in an airtight container, Blue Velvet Oreo Brownies can last in the refrigerator for 3-5 days. After that, they may start to lose their texture and flavor. If you’d like to keep them longer, consider freezing them. Properly frozen, they can last up to three months.
These frequently asked questions should help you navigate any challenges that arise while making and storing Blue Velvet Oreo Brownies. In the next section, we’ll conclude the article with final thoughts and some encouragement to experiment with this unique and delicious dessert.
Conclusion and Final Thoughts on Blue Velvet Oreo Brownies
Blue Velvet Oreo Brownies are a unique and delightful dessert that combines the rich flavor of chocolate with the creamy texture of Oreo truffle and a striking blue hue. Throughout this article, we’ve explored the history of velvet cakes, outlined the ingredients needed for this recipe, and provided detailed step-by-step instructions to create these decadent brownies.
These brownies are perfect for special occasions, gatherings, or simply when you want to treat yourself to something extraordinary. The combination of blue velvet brownies, Oreo truffle layer, and white chocolate topping makes for a truly indulgent experience. Whether served with whipped cream, ice cream, or enjoyed on their own, these brownies are sure to be a hit.
The versatility of Blue Velvet Oreo Brownies allows for creativity and experimentation. You can try different food colorings, chocolates, and toppings to customize the recipe to your liking. This flexibility makes the brownies a fun baking project, suitable for both experienced bakers and beginners.
Thank you for exploring this guide to Blue Velvet Oreo Brownies. I hope you’ve found inspiration and helpful tips to create this unique dessert in your own kitchen. Remember, baking is about enjoying the process and sharing delicious treats with others. So, go ahead and give these brownies a try—you won’t be disappointed.
Happy baking!